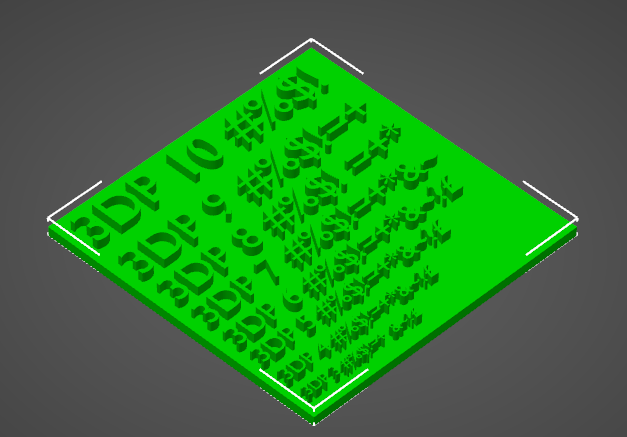
f-log

just another web log

26 Feb 2022:
three times happy update job learning and octopus
I finally finished my Level 4 Software Developer apprenticeship programme. After two years, almost to the day, I received my certificate, Distinction across the board !
Very happy!

Got a new job, and they not only want me to work fully remote, sent me a brand new laptop but ... they asked me to WIPE WINDOWS and install Linux !
Very happy!

Set up OctoPrint and have been printing more.
Very happy!

Lots of printing updates to follow.
02 Feb 2022:
a short walk to a d20
Now I am on a roll :p

d and d dice from lucky bag

I found there is a Geek Retreat 3 minutes walk from here and they were running learn Dungeons and Dragons!

So I learned (a bit) and played (a bit) and bought my first set of dice.

Yes, there is a D20 in there!
02 Feb 2022:
four black disks and some spaghetti
It has finished printing but, before we get to that...

This what I printed out a few days ago.
3d printed disks for depth testing

Yes, it really is that exciting. Four black disks!

Firstly I only have black filament and secondly, I was testing the depth.

Each disk is 2 mm shorter than the last.
8 mm
6 mm
4 mm
2 mm

The 2 mm printed fine and has a solid feel to it.

That is why the Text test print has a base of 2 mm

and just to show you that not every print goes perfectly.
3d printed disks that spaghettified

After cancelling the print and removing the mess, I made no changes and the second attempt just worked *shrug*
02 Feb 2022:
guess the thing with the things in it
and while that is 
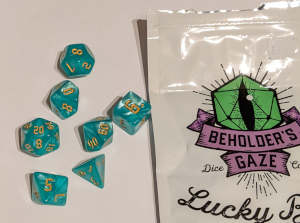
printing lets look at something I got for Christmas :D

But, what is it?
Budi device closed

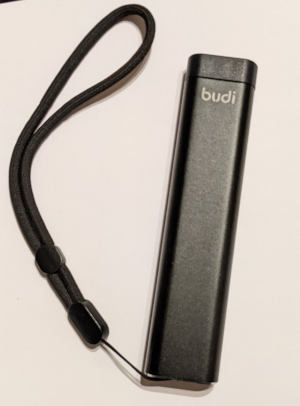
If you guessed something to do with vaping then you are ... WRONG! (but in the same camp as most people I asked)

Here is a clue. You can pull the bottom bit out, like so.
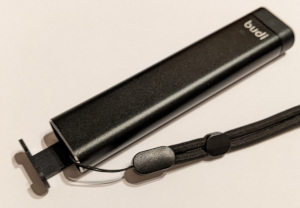
Budi device rear opened

Still no idea?

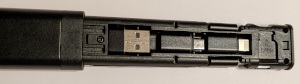
What if I open up the other end.
Budi device opened showing micro SD card slots

FYI it doesn't come with the blue Micros SD card, I added that.

So you must know exactly what it is now?

Here is the other side
Budi device opened showing connectors

OK, now lets disassemble it
Budi device opened and disassembled

So its a ...

well, sort of ...

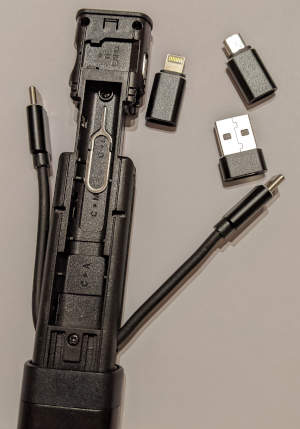
it has a mobile phone SIM tool
3x USB connectors of different types
a cable (that is fully detachable)
a number of slots for Micro SD cards
and that weird tail thing that comes out the back

and there is something else that you cannot see in the photos.

a Micro SD card reader!

I love this thing and have been using it daily for so many different tasks.

Lets start with the funny tail. That is a phone stand. Nothing special but, it works and I have used it.

The cable is USB C - USB C and the 3x connectors are USB C - USB A, USB C - Micro USB and USB C - Lightning.

So with a USB C power supply I can charge just about any phone or Xbox controller :D

I can also use the Micro SD card reader on just about any device that supports connection.

AND ... it has all these handy slots to store Micro SD cards!

AND ... it has a nice metal case that feels reassuringly heavy.
02 Feb 2022:
super slicing makes little difference to text
I wanted to confirm how small I could print 3D text.

Created a test using the previous techniques

Here it is imported into the slicer. with the correct scale
screen capture Prusa slicer text size printing test

The Ender 3V2 has a number of detail levels.
From 0.28 mm - 0.08 mm

I tried slicing at

Draft 0.28 mm
screen capture Prusa slicer text size printing test - draft sliced


Normal 0.2 mm
screen capture Prusa slicer text size printing test - normal sliced

Super Detail 0.08 mm
screen capture Prusa slicer text size printing test - super detail sliced

and as you can see it made very little difference how the slicing affected the text.

I am currently attempting to print at Super Detail...

02 Feb 2022:
how long is your gcode file name for the ender
Quick random observation about the Ender 3V2 3D printer.

The maximum length of gcode file name (including ".gcode") is 71 characters. 72 and above just don't show up when the card is in the device.

Ask me how I know :(
02 Feb 2022:
exporting correctly scaled stls for prusa slicer from blender
and now for exporting for Prusa Slicer.

I had loads of problems export STL files from Blender Prusa Slicer would always ask if I had accidentally exported in inches and what ever I said the scale was wrong :(
Manually scaling in Prusa Slicer only got me so far and all the advice online is different.

A quick trials and the results are in.

For the Export options from the File menu in Blender

Set the
Include: Selection
Scale: 1.00
(Do not be tempted to check Scene Unit)

screen capture blender export STL settings for 3d printing

Or you can use the 3D-Print Toolkit, in which case all you need to set is
Apply Scale: UNCHECKED

screen capture blender 3D-print toolkit export STL settings for 3d printing

Too many guides suggest changing the scale but in my tests the above selections work.

Your Mileage May Vary

01 Feb 2022:
extruding projected text into blender meshes
One of the things I have been meaning to test on the 3D printer is text.

Adding text to an object in Blender would normally require a Boolean addition, but a cleaner way is ...

Create a new Text object and ensure that the Fill Mode is set to None

Screen capture Blender Text settings fill mode none

this creates the cookie cutter letters we need for the next step.

Ensure the text is over your target object. Best to switch to an Orthographic view e.g. Top

Then select the Text first and then your target Mesh.

Enter Edit mode and from the Mesh menu Select Knife Project

Screen capture Blender Mesh knife project

The letter text shapes will now be 'cut' into your mesh and you can hide/delete the original text object.

A little extrude and your text will be a relief upon your mesh.

And to check that you can print it, use the Measure tool.

Screen capture Blender extrude and measure text

next time, exporting to Prusa Slicer
01 Feb 2022:
setting up blender for 3d print modeling
I have finally found somewhere out of the way to setup my Ender 3v2 3D printer.

To set up Blender to do 3D modelling for printing you have to do absolutely nothing... But it pays to follow the options to make your life much easier.

The main one is Scene Units
Unit System: Metric
Unit Scale: 0.001
Length: Millimetres

Screen capture Blender Scene Units for 3D printing

This will tell Blender we are working on small things, but then requires some follow up settings.

The View tab needs to be updated with new Clipping values so we can zoom in and out sensibly.
Clip Start: 0.1 mm
End: 10000 mm

Screen capture Blender Viewport clipping for 3D printing

If you don't do this zooming in to far will eat your model and zooming out will just not work very well.

The Viewport needs one more tweak.
Guides Scale: 0.001

Screen capture Blender Viewport guides for 3D printing

Now you are ready start modelling!

After you have done modelling you may benefit from the 3D-Print Toolbox. It is totally free and comes built into Blender You just need to enable it.

Edit/Preferences/Add-ons: 3D-Print Toolbox
Screen capture Blender toolkit addon for 3D printing

and once enabling it you can turn on the Mesh Analysis.

Shading/Mesh Analysis

Screen capture Blender mesh analysis for 3D printing

In the 3D-Print Toolbox tab you can check and fix a lot of common issues.

Screen capture Blender toolkit tab for 3D printing

I mostly use the Check All button. You can ignore the Overhanging face:1 as the Mesh Analysis shows it as the face that will contact the printer bed.
01 Feb 2022:
you got how many youtube subscribers
February has brought a surprising and unexpected update around something I started 6 years ago.

screen capture of YouTube 102 subscriber count

That's right, 102 subscribers!

21.5 subscribers per year (apx)

Not bad considering I never ask anyone to subscribe :)
loading results, please wait loading animateloading animateloading animate
[More tags]
rss feed

email

root

flog archives


Disclaimer: This page is by me for me, if you are not me then please be aware of the following
I am not responsible for anything that works or does not work including files and pages made available at www.jumpstation.co.uk I am also not responsible for any information(or what you or others do with it) available at www.jumpstation.co.uk In fact I'm not responsible for anything ever, so there!