f-log

just another web log

31 Jan 2018:
when auto blending 3 becomes 4 on github
So, how are the three python scripts for automating Blender rendering going?

Well for a start there are now four. The forth is just a list of settings to get the render working without the standard command line options, as they are bit limited.

# Blender render settings
# FYI : only uses default "Scene"
import bpy

FILEFORMAT='FFMPEG' # 'PNG'
#bpy.data.scenes[my_scene_name_here].file_format = 'H264'
#bpy.data.scenes[my_scene_name_here].format = 'H264'
#bpy.data.scenes[my_scene_name_here].use_lossless_output = True
OUTPUTFILENAME='/home/rednuht/temp/'

bpy.context.scene.render.resolution_x = 1920
bpy.context.scene.render.resolution_y = 1080
bpy.context.scene.render.resolution_percentage = 25
bpy.context.scene.frame_start = 1
bpy.context.scene.frame_end = 360
bpy.context.scene.frame_step = 1
bpy.context.scene.render.pixel_aspect_x = 1
bpy.context.scene.render.pixel_aspect_y = 1
bpy.context.scene.render.use_file_extension = True
bpy.context.scene.render.image_settings.color_mode ='RGB'
bpy.context.scene.render.image_settings.file_format=FILEFORMAT
bpy.context.scene.render.image_settings.compression = 90
#bpy.context.scene.render.use_stamp = 1
#bpy.context.scene.render.stamp_background = (0,0,0,1)

bpy.context.scene.render.use_antialiasing = True
##sampling;=path tracing
bpy.context.scene.cycles.progressive = 'PATH'
bpy.context.scene.cycles.samples = 50
bpy.context.scene.cycles.max_bounces = 1
bpy.context.scene.cycles.min_bounces = 1
bpy.context.scene.cycles.glossy_bounces = 1
bpy.context.scene.cycles.transmission_bounces = 1
bpy.context.scene.cycles.volume_bounces = 1
bpy.context.scene.cycles.transparent_max_bounces = 1
bpy.context.scene.cycles.transparent_min_bounces = 1
bpy.context.scene.cycles.use_progressive_refine = True

#Render results
#bpy.ops.render.render(write_still=True)
bpy.ops.render.render(animation=True)


And the main "track.py" script failed at the first hurdle. When opening the initial .blend file to create an orbit animation it choked on "context". The .blend file had been saved in Edit mode and most of my commands needed Object mode.

the fix is to force it to Object mode.
bpy.context.scene.layers[0] = True
bpy.ops.object.mode_set(mode='OBJECT')


As these scripts seem to be evolving a bit more than I expected I have created a github repo https://github.com/robgithub/camera-track-endevour

Current running operation is
cameras=(Camera.top Camera.bottom)
materials=(LL_WireTrans LL_WireHold LL_Clay LL_Glass)
SOURCE=/home/rednuht/projects/blender/Raspberry\ Pi\ 3\ Model\ B\ HiRes/circuitboard22.blend
NAME=C022
LAYERS=0
for cam in ${cameras[@]}; do
for mat in ${materials[@]}; do
./blender --background "$SOURCE" --python ~/projects/blender/camera\ track\ endevour/track.py --python ~/projects/blender/camera\ track\ endevour/materials.py --python ~/projects/blender/camera\ track\ endevour/setup.py -noaudio --python ~/projects/blender/camera\ track\ endevour/render.py -- -c "$cam" -m "$mat" -n "$NAME" -l "$LAYERS"
done
./blender --background "$SOURCE" --python ~/projects/blender/camera\ track\ endevour/track.py --python ~/projects/blender/camera\ track\ endevour/materials.py --python ~/projects/blender/camera\ track\ endevour/setup.py -noaudio --python ~/projects/blender/camera\ track\ endevour/render.py -- -c "$cam" -n "$NAME" -l "$LAYERS"
done


Which sets up some variables, loops through the cameras and loops through the materials plus one last render without any materials for each camera, i.e. the actual materials.
This leaves me with ten animations of 15 seconds, 360 frames per blend. But, as some of the .blends are not that interesting I am only up to 101 animations, still working on the blend 22 set.
27 Jan 2018:
i claim no part in writting big bad blender code
Time to see the most "Blendy" of the three python scripts for automating Blender rendering.


import bpy, math

print("Camera tracking script starting")
TARGET="Empty.target"
TRACK="Curve.camera.track"
CAMERATOP="Camera.top"
CAMERABOTTOM="Camera.bottom"
TRACKSIZE=11

bpy.context.scene.layers[0] = True
# Create empty(camera target)
bpy.ops.object.empty_add(type='SPHERE', view_align=False, location=(0, 0, 0), layers=(True, False, False, False, False, False, False, False, False, False, False, False, False, False, False, False, False, False, False, False))
bpy.context.object.name = TARGET
# Create camera track curve
bpy.ops.curve.primitive_bezier_circle_add(radius=1, view_align=False, enter_editmode=False, location=(0, 0, 0), layers=(True, False, False, False, False, False, False, False, False, False, False, False, False, False, False, False, False, False, False, False))
bpy.context.object.name = TRACK
bpy.context.object.scale[1] = TRACKSIZE
bpy.context.object.scale[2] = TRACKSIZE
bpy.context.object.scale[0] = TRACKSIZE
# Create Top camera
bpy.ops.object.camera_add(view_align=True, enter_editmode=False, location=(0, 0, 0), rotation=(0,0,0), layers=(True, False, False, False, False, False, False, False, False, False, False, False, False, False, False, False, False, False, False, False))
bpy.context.object.name = CAMERATOP
# Parent to camera track
bpy.data.objects[TRACK].select = True
bpy.context.scene.objects.active = bpy.data.objects[TRACK]
bpy.ops.object.parent_set(type='OBJECT', keep_transform=False)
bpy.data.objects[TRACK].select = False
bpy.context.scene.objects.active = bpy.data.objects[CAMERATOP]
bpy.context.object.location[1] = 0-TRACKSIZE     # Y
bpy.context.object.location[2] = 3     # Z
# Create tracking constraint
bpy.ops.object.constraint_add(type='LOCKED_TRACK')
bpy.context.object.constraints["Locked Track"].target = bpy.data.objects[TARGET]
bpy.context.object.constraints["Locked Track"].track_axis = 'TRACK_NEGATIVE_Z'
bpy.context.object.constraints["Locked Track"].lock_axis = 'LOCK_X'
# Create Bottom camera
bpy.ops.object.duplicate()
bpy.context.object.name = CAMERABOTTOM
bpy.context.object.location[2] = -3     # Z
bpy.data.objects[CAMERABOTTOM].select = False
# Create orbit animation
bpy.data.objects[TRACK].select = True
bpy.data.objects[TRACK].keyframe_insert(data_path='rotation_euler', frame=(bpy.context.scene.frame_current))
bpy.context.scene.frame_end = 360
bpy.context.scene.frame_current = 360
bpy.data.objects[TRACK].rotation_euler = ( 0, 0, math.radians(359) )
bpy.data.objects[TRACK].keyframe_insert(data_path='rotation_euler', frame=(bpy.context.scene.frame_current))
# Set interpolation
for fc in bpy.data.objects[TRACK].animation_data.action.fcurves:
    fc.extrapolation = 'LINEAR'
    for kp in fc.keyframe_points:
        kp.interpolation = 'LINEAR'

print("Camera tracking script finished setup")
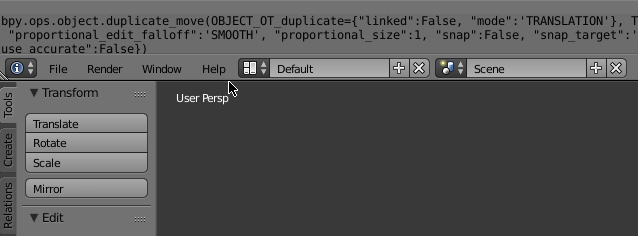

So that all looks big and scary but I had to write almost NONE of it. Blender s Report Console
partial blender screen shot showing the report console
is writing all the code as you complete the actions in the editor!

I did change all the String names to variables, but mostly it is unchanged.

The first action line
bpy.context.scene.layers[0] = True
was needed to force the target file to allow changes to the 1st layer. The code had worked fine in all my tests where no other layers were selected, but when I came to the actual Pi files that used multiple layers, weird things happened. Such as certain objects not getting added, even though no errors were reported and the script completed. I had seen a number of example scripts starting with this command, so it was a no-brainer to add it.

Then we just create and name an Empty at the center of the scene
# Create empty(camera target)
bpy.ops.object.empty_add(type='SPHERE', view_align=False, location=(0, 0, 0), layers=(True, False, False, False, False, False, False, False, False, False, False, False, False, False, False, False, False, False, False, False))
bpy.context.object.name = TARGET


Create a Bezier circle, scale and name it
# Create camera track curve
bpy.ops.curve.primitive_bezier_circle_add(radius=1, view_align=False, enter_editmode=False, location=(0, 0, 0), layers=(True, False, False, False, False, False, False, False, False, False, False, False, False, False, False, False, False, False, False, False))
bpy.context.object.name = TRACK
bpy.context.object.scale[1] = TRACKSIZE
bpy.context.object.scale[2] = TRACKSIZE
bpy.context.object.scale[0] = TRACKSIZE


Create a Camera and name it
# Create Top camera
bpy.ops.object.camera_add(view_align=True, enter_editmode=False, location=(0, 0, 0), rotation=(0,0,0), layers=(True, False, False, False, False, False, False, False, False, False, False, False, False, False, False, False, False, False, False, False))
bpy.context.object.name = CAMERATOP


Now parent the Camera to the "Track"
# Parent to camera track
bpy.data.objects[TRACK].select = True
bpy.context.scene.objects.active = bpy.data.objects[TRACK]
bpy.ops.object.parent_set(type='OBJECT', keep_transform=False)
bpy.data.objects[TRACK].select = False
bpy.context.scene.objects.active = bpy.data.objects[CAMERATOP]
bpy.context.object.location[1] = 0-TRACKSIZE     # Y
bpy.context.object.location[2] = 3     # Z

I also moved the camera deliberately after the parenting, to make sure the Camera was parented to the "Track" and not the other way around.

At this point the Camera is still pointing straight down, so we setup a tracking constraint to make it "look at" the Empty
# Create tracking constraint
bpy.ops.object.constraint_add(type='LOCKED_TRACK')
bpy.context.object.constraints["Locked Track"].target = bpy.data.objects[TARGET]
bpy.context.object.constraints["Locked Track"].track_axis = 'TRACK_NEGATIVE_Z'
bpy.context.object.constraints["Locked Track"].lock_axis = 'LOCK_X'

Had to try a large number of these options before I hit on the combination that worked for me.

Now I can duplicate the "Top Camera", inheriting it's parenting and constraints, before repositioning and renaming it
# Create Bottom camera
bpy.ops.object.duplicate()
bpy.context.object.name = CAMERABOTTOM
bpy.context.object.location[2] = -3     # Z
bpy.data.objects[CAMERABOTTOM].select = False


Everything is setup except the animation. To create a neat cyclic animation I changed the length of the animation to 360 frames and set the rotation calculation to 359. To get all the Blender code I had to run with the additional command line parameter
--debug-wm

and finally, I did not want the default easing, but instead, constant velocity. A number of suggestions on how to toggle the default extrapolation type DID change the default extrapolation type but did NOT affect the animation. So the solution was to go through the animation one KeyFrame at a time and set them to Linear. That final loop was almost the only Python I needed to write.

# Set interpolation
for fc in bpy.data.objects[TRACK].animation_data.action.fcurves:
    fc.extrapolation = 'LINEAR'
    for kp in fc.keyframe_points:
        kp.interpolation = 'LINEAR'


see all the bpy.context etc? Nearly all the example scripts you see will extrapolate those out to alias variable names. As I was copying and pasting from Blender directly I thought I should keep them in.

Now to start using these scripts to make some animations, there will be quite a few.
27 Jan 2018:
copy and paste blender with a sprinkling of python
Of the three python scripts for automating Blender the setup.sh is the most non Blender, but it should not be thought as any less important.


import bpy
import sys     # to get command line args
import argparse # to parse options for us and print a nice help message

# argument parsing code from https://developer.blender.org/diffusion/B/browse/master/release/scripts/templates_py/background_job.py

def main():
    import sys     # to get command line args
    import argparse # to parse options for us and print a nice help message

    # get the args passed to blender after "--", all of which are ignored by
    # blender so scripts may receive their own arguments
    argv = sys.argv

    if "--" not in argv:
        argv = [] # as if no args are passed
    else:
        argv = argv[argv.index("--") + 1:] # get all args after "--"

    # When --help or no args are given, print this help
    usage_text = (
            "Run blender with this script:"
            " blender --python " + __file__ + " -- [options]"
            )

    parser = argparse.ArgumentParser(description=usage_text)

    # Possible types are: string, int, long, choice, float and complex.
    parser.add_argument("-m", "--material", dest="material", type=str, required=False,
            help="This material will be used for the render layers")

    parser.add_argument("-l", "--layers", dest="layers", type=str, required=False,
            help="This comma separated list of layer numbers defines which are the render layers")

    parser.add_argument("-c", "--camera", dest="camera", type=str, required=False,
            help="Camera to set active")

    args = parser.parse_args(argv) # In this example we wont use the args

    if not argv:
        parser.print_help()
        return

    # Run the example function
    #example_function(args.text, args.save_path, args.render_path)
    print("setting up")

    # Set layers
    if args.layers :
     print("--layers", args.layers)
     layerarray=args.layers.split(',')
     for i in range(len(bpy.context.scene.layers)) :
        if str(i) in layerarray :
         bpy.context.scene.layers[i]=True
        else :
         bpy.context.scene.layers[i]=False

    # Set render material
    if args.material:
     print("--material", args.material)
     if args.material in bpy.data.materials :
        bpy.context.scene.render.layers["RenderLayer"].material_override = bpy.data.materials[args.material]

    # set camera
    if args.camera:
     print("--camera", args.camera)
     if args.camera in bpy.data.objects :
        bpy.context.scene.camera = bpy.data.objects[args.camera]

    print("set up complete")

# call main function
main()


So apart from the obvious customisation for my specific parameters and the "set" code, this is all copied verbatim from https://developer.blender.org/diffusion/B/browse/master/release/scripts/templates_py/background_job.py which is just perfect for what I needed.

Out of the three python scripts this is the only one I had to actually write some Python.

The --layers parameter represents the layers that should be used in the rendering. I like to segregate different parts and often just the bits I am working on to separate layers, just to keep everything cleaner. Here the values are received as comma separated values e.g.

1,3,9

This example gets interpreted as three layers to enable and the code loops through all the layers setting them to be "used" or "unused" as required. Any number of values works, even a single layer

The --material ideally uses a string name from my materials library but it checks to see if the supplied name is a material Blender has access to. If the material is found it used to set the Render material, overriding any other material assignments.

Remember, this (and the other) scripts are operating on an existing file, not altering it.

Finally we need a way to select the Top or Bottom camera, though any named camera is acceptable.

All these settings are optional. If you have a non-optional parameter the background_job.py example script does include one.

The blendering Blender script next time.
22 Jan 2018:
command line avalanche only way to link script blender
Of the three python scripts for automating Blender the materials.sh is the shortest(in number of lines, not in length of lines).


import bpy

print("Material library script starting")
# Load materials
bpy.ops.wm.link(filepath="/home/user/camera track endevour/materiallibrary.blend/Material/LL_WireTrans", directory="/home/user/camera track endevour/materiallibrary.blend/Material/", filename="LL_WireTrans", files=[{"name":"LL_Clay", "name":"LL_Clay"}, {"name":"LL_Glass", "name":"LL_Glass"}, {"name":"LL_WireHold", "name":"LL_WireHold"}, {"name":"LL_WireTrans", "name":"LL_WireTrans"}], relative_path=True)
print("Material library script finished")


The first line is the most important and will be in most Blender related scripts as it gives access to all the Blender objects and functions. The print statements are there so I can track which script is running when all I can see is the command line.

The really wacky long line was not cleverly written or even researched by me, Blender wrote it. In fact, Blender will happily write all sorts complex python code for you...

partial blender screen shot showing the report console
Here I have pulled open the Report Console and then duplicated the default Cube. There is a lot more code of the side of the screen shot and if I were to copy and execute it, Blender would duplicate the default Cube again and move it to the same place. Blender happily adds these type of commands to the Report Console when you perform "most" actions.

Unfortunately, the actions to add a link .blend file and select the materials is not in the list of "most". But you can turn on various kinds of debug via the command line.

I did use
--debug-wm
to see a few extra commands but it did not include the materials link.

--debug-all
showed even more in the Report Console, but not the materials link.

But it did flood the command line and in the huge avalanche, tucked in was that line. The pure code to do the one thing I needed, with all the paths and other names perfect for my system.
Copied and Pasted it into my script, ran it from the command line and there were my materials all nicely linked!

More scripting goodness next time.
21 Jan 2018:
3x beefed up blender pi command line pipeline
So I have 98 iterations of the Raspberry Pi 3 HiRes project blend file and I wondered how I could get consistent renderings from each to compile into a "making of" video.

In the Save As window is a +. If you choose Save As and click the + each file will have an incremented number at the end of the name. It is very handy to try things out knowing nothing will be lost and .blend files are quite small, if you do not pack textures into them.

Blender allows you to run it from the command line, with and without GUI and include python scripts.

blender my.blend --python myscript.py

Note: the order is important. Blender processes the requests in a first come, first served, order. I was putting my script first for ages as I did not get any errors. But it was executing before the blend file had been loaded :(

You can also string python scripts together on the command line.

blender my.blend --python myscript1.py --python myscript2.py

Will load the my.blend file then execute myscript1.py and then myscript2.py

and if that was not cool enough, you can pass parameters to the scripts(with a few caveats).

blender my.blend --python myscript1.py --python myscript2.py -- --my-parameter "myvalue"
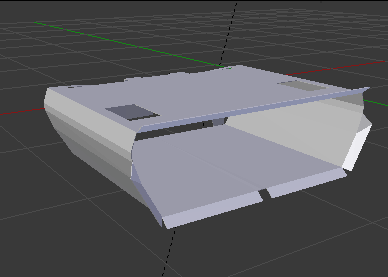
Blender ignores everything after the "--" and any of the python scripts are free to do with them what they want. Blender comes with a command argument parsing feature argparse that makes this a breeze.

if you run Blender with --background then the GUI does not load and just executes everything you asked of it before quitting.

So, I was able to create three scripts and one library file that I can string together on the command line so from the command line Blender ...

Loads my target .blend file
Adds an empty
Adds a bezier circle
Adds a camera
Parents the camera to the bezier circle with a locked track constraint to the empty
Duplicates the initial parented camera
Adds key frames to animate the bezier circle and it's children (the two cameras)
Links a materials library .blend
Sets the Render layers material, if supplied in the arguments
Sets the Render layers, if supplied in the arguments
Sets the active camera, if supplied in the arguments
Starts rendering

phew! There is a lot there.

The .blend file load and the rendering are just standard command line Blender
The Camera track was a single script, more on that in another post.
The Material library link is the second script and has only one(functional) line it, but will have another post.
The third script handles the command line parameters to allow me to select the "Top" or "Bottom" camera on the "Camera track" and the layers I want rendered. This is because, as I have worked different objects have been placed in different layers for various reasons.
Also in that script I can set the overriding material to do the rendering with. Currently I have a "clay", "glass" and two wire frame materials to call on.

This means I can start renders for complete or partial animations of any blend file(the "camera track" is tuned to the Raspberry Pi 3 HiRes project ) using the materials in the blend files or overriding them with entries from my library. Also selecting one of two custom animated orbiting cameras.

There was so much learned in the last two days that further posts will expand on the tricks and tips required.
20 Jan 2018:
auto smooth is the anti pro smooth i have been looking to blend
I have finished the texture updates to remove shadows on the Raspberry Pi 3 HiRes project.

Kept finding "one more" bit to tweak, but I am putting a stop to that now or I will never be finished.

Have started a dedicated page to show off all the past and future work for Raspberry Pi 3 HiRes project.

One last note from the world of Modelling.

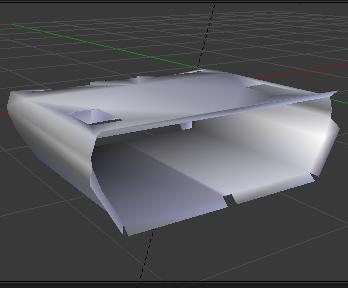
3d render highlighting flat shading
This is the USB micro power supply connector from the Raspberry Pi 3 HiRes project as it was. You can clearly see the sides are not smooth. Although it looks OK at a distance I was not happy.

3d render highlighting smooth shading
Here it is again with "Smooth Shading" enabled. I have angled and lit it to show off the excessive smoothing. If only I could smooth non flat parts of the model...

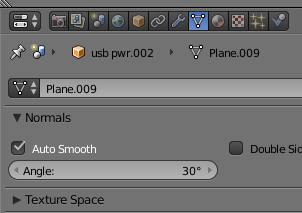
blender setting auto smooth 30
Ah ha! "Auto Smooth" with the angle set to 30 degrees.

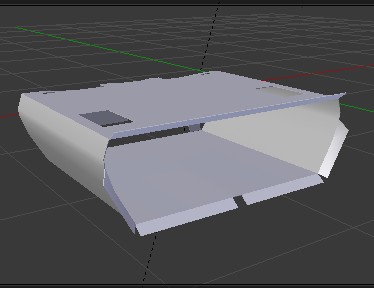
3d render highlighting auto smooth shading set to 30
That looks perfect. I also went around and applied the same fix to all the other connectors.

Blender always surprises me, in a good way!

OK, next steps are to flesh out the empty Raspberry Pi 3 HiRes project page and start tidying up.
20 Jan 2018:
what the tag or failure for all
A couple of flog stats since the year 2017 summary

number of different tags 1115
3365 total posts with tags
803 unique tags

Top Tags
Raspberry pi 108
linux 108
code 87
review 79
Blender 69
fail 50
usb 50
Blender 69

Slightly concerned with the fail one, but all learning is improved by a bit of abject and total failure !)

All those stats are only since I started tagging in Feb 2007. I notice the css is pretty screwed up on those old pages now :(
07 Jan 2018:
jet set radio random vmu blast from the past mystery
How is this for random.

I need some background music so I turned to the internet streaming sensation
Radio Sega

On there I saw a link to The Dreamcast Junkyard
That has a rather surprising number of stories just from the last month, let alone year. After reading rather too many articles, I decided to look around and see if my Space Invaders VMU style was mentioned anywhere.
http://www.thedreamcastjunkyard.co.uk/2006/05/vmu-wonders.html
Nice, 7/10, not bad at all!

During my search I had come across a page about a limited edition Jet Set Radio graffiti set on VMU, could it be?

Remember when I was slightly confused at being asked to update some 15+ year old code to support 64 bit? It seems that that event used my code

VMU squad

and then, I found the Complete History of Seaman which was a really nice video and showed me loads of stuff I did not know about this under rated Dreamcast game.
07 Jan 2018:
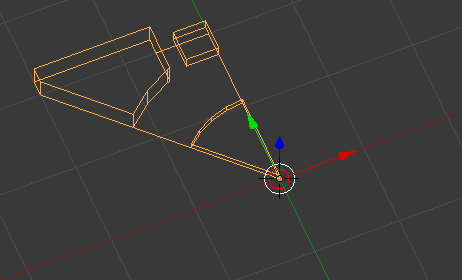
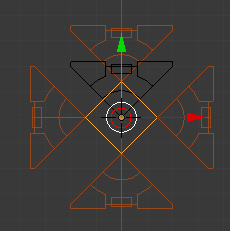
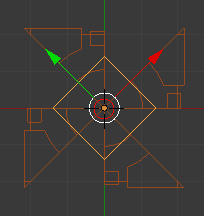
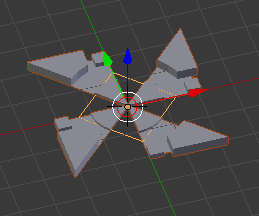
blender fail companion cube
Yet another distracted Blendering I did recently.

This time I had a specific goal. To create the minimum of geometry and use Modifiers to do the heavy lifting. It did not turn out quite as I wanted, but there were some good bits so...

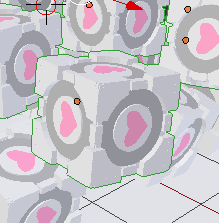
Looking at the Portal Weighted Companion Cube that I got as part of Funko Pop! Chell, it seems highly symmetrical, apart from the heart.

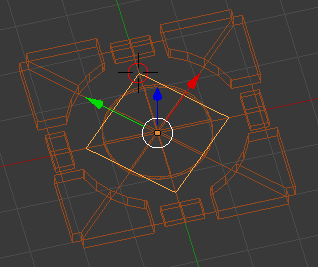
I started with a plane that I moved to the right and above the center point. Then cut it in half diagonally with the Knife tool and extruded a couple of subdivided edges.
screenshot of part of a portal companion cube

After extruding into 3D two areas I used the Knife Project to slice two circles.
This did nothing other than create edges which I could then use to remove faces.
screenshot of part of a portal companion cube 3D

This 3D "slice" should be able to be rotated 45 degrees 16 times and we get the cube face! Not quite, needs to be mirrored and then repeated at 90 degrees.
screenshot of part of a portal companion cube 3D

I did try using an Array Modifier with a Simple Deform - Bend - 360 but it just bent everything, not just the layout. So I switched to using an Particle Emitter.
screenshot of part of a portal companion cube 3D no mirror
screenshot of part of a portal companion cube no mirror 3D

This seemed to work and just need the center reset, so instead of appearing at the extremities of the base plane, would create a single "face". I tried a lot here and I am not sure why it did not work. In the end I settled for Scaling the base emitter plane. First I tried a scale of 0, but that messed everything up, so I just scaled manually until I could not go any further.
Even though there were technically gaps between the "slices" you could not see them, even when zoomed in.
screenshot of face of a portal companion cube 3D

Then I extruded the edges in the base "slice" to get rid of the corner square holes.

Here I tried to use another Particle Emitter, but Particle Emitters do not like being Particle Emitters and everything I tried made things very messy, just emitting from cube.
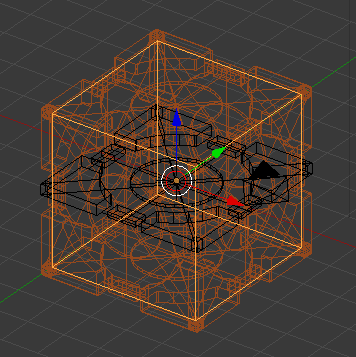
Then I remembered hearing about Dupliverts. This took a lot of trial and error but eventually I Converted the Particle Emitter into a Mesh and Parented it to a Cube with Dupliverts.
The key was to clear all the Rotation, Scale and Transforms from the newly created Mesh.
screenshot of a portal companion cube wire frame

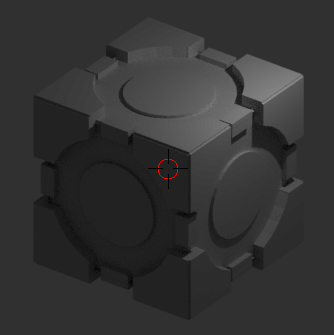
Which made this rather cool basic Companion Cube.
screenshot of a portal companion cube base render

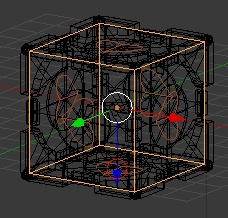
It was a simple matter to add a 2D Mesh with a Mirror modifier and use the Proportional edit to create a heart. This was then Dupliverted with another Cube and joined to the Companion Cube mesh.
screenshot of a portal companion cube wire frame with hearts

screenshot of a portal companion cube material view

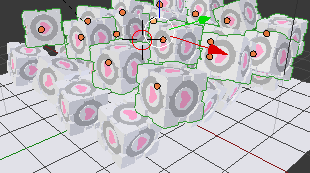
I could not help but add a plane as the floor, set it as a passive physics element and then duplicate a load of Companion Cubes as active physics.
screenshot of a portal companion cube animation frame

This looked really cool in the Material view when previewed but the resulting animation(that took over 24 hours to create at 1920x1080) looked pretty rubbish because of the corners and edges over lapping.

I might revisit this in future. The initial Knife Project did not create enough geometry to get nice curves and I now see that the corners do not have a vertical cut anyway. Would have been nice to line up everything, for this I just need to have been more careful earlier on. Could have skipped Particle Emitter and just stuck with Dupliverts.

The end goal would have included making the edges nice and smooth. Now I can also see my Portal 2 Cube has orange lines appearing like cross hairs on each face.
07 Jan 2018:
distracted star growth blendering
Here is another distracted Blendering I did recently.


It is insanely simple to set up.

Extrude a single plane from the default cube and scale to a point. Then add an Array Modifier with Simple deform - Bend - 360.

Then animate the Array - Count. I then edited the animation curve to make the progression start slow and get faster.

Finally the Principled BSDF material with a healthy dose of Sub Surface gives the object a realistic depth in the lighting.
07 Jan 2018:
xmas 2017 better late than never
Oops, forgot to post this render from Xmas

3D render of an Christmas tree in the snow with presents and snow flakes

The tree was created using the built-in Sapling Tree Gen. This creates a curve that can be Solidified then tinsel added by my usual method.

The presents were created and animated as with last years, just with a bit more care. The presents fell from a much lower height and I used the default physics settings. The bows were quite time consuming, but were basically extruded curves. The texture was something that did not quite work out. I wanted to use procedural textures and this is the Checker texture stretched. Looks fine on the sides by totally fails on the tops and bottoms. I could have fixed this with more time.

The snow flakes were a simple plane extruded a couple of times with a mirror modifier and then an Array Modifier with Simple deform - Bend - 360(which is my new best friend). Then duplicated into a large grid and Randomly transformed.

I desperately wanted to light is with an HDR image but the results were not very good, so I just rendered with a transparent background and used Gimp to added the gradient.

One last cool bit was using the Principled BSDF with Sub Surface to give the ice and snow a realistic sheen. More on that in another post soon.

Not quite as late as last year's :)

02 Jan 2018:
a 2017 yearly review in january what
2018 already?
Tis the season to do a yearly summary.

First some stats. Since adding an rss xml feed back in 2007 I had forgotten I had a happy little script updating an xml file with every post. But this f-log has been running since 2002

egrep pubDate scripts/f-log/rss/flog.xml | egrep -o "20[0-9][0-9]" | uniq -c
(remember "friends do not let friends use standard non egrep grep")

     73 2017
     60 2016
     61 2015
     64 2014
     50 2013
     32 2012
     21 2011
     70 2010
     45 2009
    101 2008
    106 2007


and here is the 2017 Yearly Summary
loading results, please wait loading animateloading animateloading animate
[More tags]
rss feed

email

root

flog archives


Disclaimer: This page is by me for me, if you are not me then please be aware of the following
I am not responsible for anything that works or does not work including files and pages made available at www.jumpstation.co.uk I am also not responsible for any information(or what you or others do with it) available at www.jumpstation.co.uk In fact I'm not responsible for anything ever, so there!